Monthly Archives: August 2015

Chain making mania

I have it.

IMG_6641

And now I can’t stop even though they take ages to make

IMG_6644

And it means my prices will have to go up

IMG_6636

And I’ll never sell anything any more

IMG_6631

But they give so much more depth to the pendants that I don’t think I can turn back now.

Man!

Off to make another one

I’ve got water and protein bars stocked up so if you don’t hear from me for a while I think I’ll be o.k.


For Nancy.

The end caps.

You can make these plain or textured, wonky or straight, rustic or perfect, but these are the way I made mine for the pieces you’ve seen.

I use fine silver.

I buy all of my sheets in fine silver and most all of my wire in sterling. I like to use fine silver for my bezel settings because it doesn’t tarnish like sterling.

Sterling tarnishes when exposed to air because it has a little more base metal in it than fine silver. Sterling is .925 silver and fine silver is .999 making it purer. PMC is also .999 as is Thai Silver.

Just love the Thai Silver :)

Back to the project…

Cut a strip of 24 gauge sterling silver, or fine silver, sheet and texture it with a favourite stamp.

IMG_6598

I have a selection of stamps from the Indian Jewelry Supply store – HERE

It’s like christmas every time I look at them.

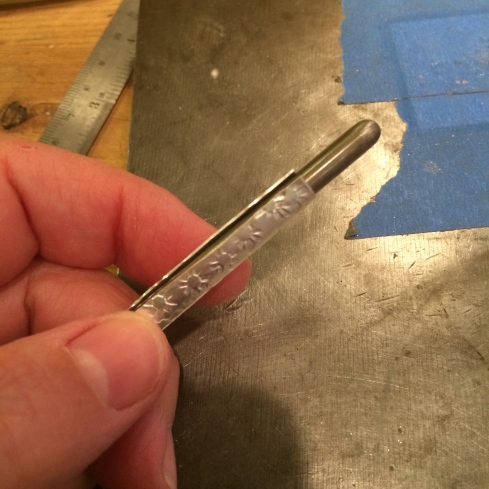
Cut a manageable length off the strip and wrap it around a mandrel.

IMG_6602

You might need to anneal the silver to do this as stamping, hammering, or any work you do to a piece of silver hardens it. Annealing the metal by running a soft flame over it until it changes colour and then quenching it, softens it again making it easy to work with.

Some people don’t quench afterward as they say the silver hardens again, but, as you may know by now, I’m too impatient to wait for it to cool on its own and I’ve found that quenching doesn’t really affect the results I want for this project.

When you’re annealing be careful not to melt the metal. It just takes practice. If it does start to melt no worries as you can then practice your reticulation skills, but that’s for another day… ;)

You want the silver to just begin to turn a dull pinkish color then take your flame away.

Now you can bend it around the mandrel until the two ends meet for soldering.

IMG_6600

The mandrel can be anything that is the shape and diameter you want. I often use anything on hand. The shanks of my stamps or dapping tools, wooden dowels, but better still are the mandrel sets that come with a jump ring maker.

Like this

116581.jpg

As you then have a selection which will last you forever and you can more easily match the mandrel diameter to the size of bead you’re using.

I’ll be using 8mm beads for these tube ends.

Now solder the seam.

IMG_6603

Once soldered you can cut the tube into the lengths you want either by hanging it over the edge of your bench pin.

IMG_6604

Or by using some other way to keep the tube secure as you saw.

This is an old paintbrush.

For this method, slowly turn the tube and gradually saw around the circumference for an even cut.

IMG_6611

Now you can put the smaller lengths of tube back onto the mandrel so that it just overhangs a couple of mm’s making it easier to file the ends straight.

IMG_6605

At this point you can decide whether to keep your tubes straight or make them wonky.

I like wonky.

So I use one of my dapping things to hammer into the tube to flare out the ends slightly.

IMG_6608

And then I might even hammer them down even more to wrinkle them.

I haven’t done that here, but just so you know all of my secrets…

IMG_6609

The next step is to punch out the silver discs which will be the end caps of the tubes.

I like them to be just a fraction larger than the tube, (including the flared out diameter), as you’re going to dome them and this reduces the diameter of the disc.

IMG_6613

Now you can use a hole punch or a drill to make a hole in the center of the discs.

IMG_6616

I’ve found the easiest way to use a hole punch is to mark exactly where you want the hole to be with a sharpie and then place the bottom of the punch over the mark.

Then you can see exactly where to punch.

IMG_6614

Now you will shape the discs into the caps using a dapping block.

IMG_6618

If you don’t have these tools you can perhaps use makeshift ones.

Making shallow holes in blocks of wood, for instance, may make a good substitute for the dapping block. You can also round off a matching dowel piece to use as the punch.

For the discs you will have to either saw them or snip them. You can then file them down when they’re soldered to the tube.

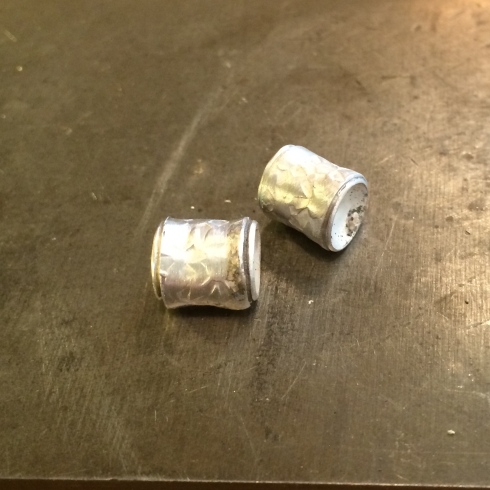
At this point you are going to solder the caps onto the tubes.

You can solder the first cap from the inside.

IMG_6620

But will solder the second cap onto the top.

IMG_6619

Warning:

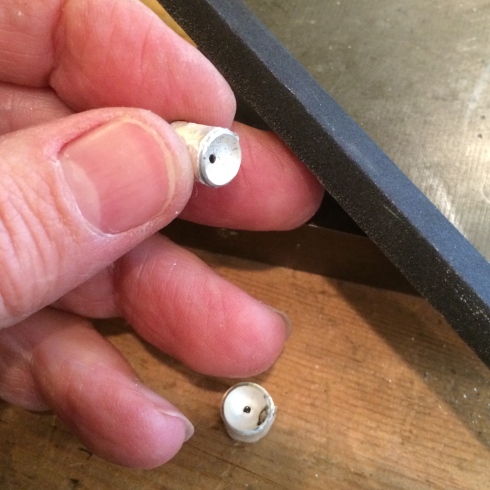
You can only do this if there is at least one hole in the silver for the hot air to escape.

If you do not leave a hole the heat will build up inside and the piece will explode!

It will fly away from the soldering board and, if you’re as lucky as me, will probably land on your body.

And it will hurt.

IMG_6621

Now clean up the edges of the caps with a file and sanding board.

IMG_6623

And they are pretty much done.

IMG_6624
These are my ‘rustic’ ones, but you can make these so that the joins don’t show. It will just take more precise measuring and filing, etc.

IMG_6626
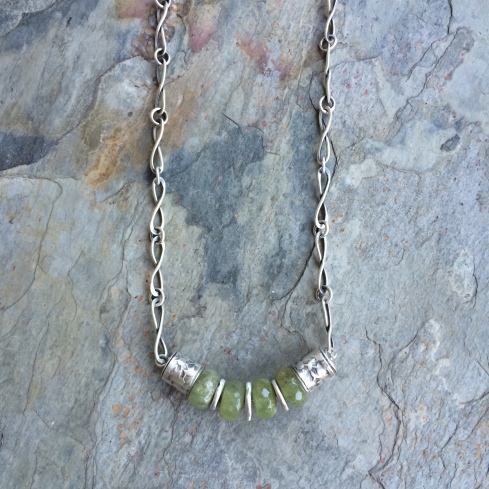
Here’s what I did with mine.

IMG_6629
:)


The 20 gauge fine silver by 8mm mandrel chain

With the bracelet.

IMG_6583

Done.


I’m a jump right in person. You?

Of course this doesn’t always go according to plan.

I’m just a little too impatient to read all the books and watch all the YouTube how too’s.

I just like to look at the pictures and wing it.

So I’ve made a few of no go’s over the years, and that’s o.k. as sometimes new ideas come from them.

I tell you this as I just want to remind you that, for most of the time, I don’t really know what I’m doing. I would hate for you to think that I have the best advice out there, even reasonably o.k. advice.

But I just love making stuff and think that if you want to have a go at something you should just do it without thinking you have to be some kind of expert at it who never makes mistakes.

Here’s a mistake.

IMG_6559

19 gauge sterling silver wire using an 8mm mandrel.

Oh yes, it looks all fine and dandy I know, but it’s stiff and lifeless.

The gauge of wire is too thick for the diameter of the ring and the chain can’t move freely.

Now, I know that when you’re using rings to make a chain you need to know the ratio between the wire gauge and the diameter of the ring.

Yep. I know that.

But when I want to make something and I get excited I ain’t got no time to go looking for a chart or read the books, so I eyeball it, make a wish, and have a go.

Don’t try this at home folks.

Actually I wasn’t far off. I think half a millimeter may have done it.

Or maybe one.

(See, I’m doing it again.)

Don’t do it people!

Get a chart.

(I haven’t found a chart yet but I’m looking.)

If you have a chart I want one in millimeters, not fractions. I can’t be doing with all of that 5/16 stuff unless you’ve also got a chart for turning 16th’s into millimeters.

Math is NOT fun for me.

Web surfing is, however, so I’m off to find my chart as soon as I finish up here.

So the chain wasn’t a waste of time really, because I also decided that sterling silver hurt my fingers too much. But using sterling silver wasn’t a waste of time either as I soldered each link perfectly, not always a regular occurrence, so that was pure satisfaction right there.

See.

So next up I made another chain, this time using 20 gauge fine silver with the 8mm mandrel.

Much better, but I’m going to make another today using the 8.5 mandrel.

You should have a go if you haven’t yet.

It’s fun.

And the sense of accomplishment having made your own chain is a wonderful thing.

Warning: I may have mentioned that I still haven’t got ‘the chart’ so you might want to wait until you, or I, find one or I actually make a chain that’s perfect.

Don’t hold your breath on that last part.

So.

Single Loop Chain.

(This is going to be boring for people who already do this, so stop reading now unless you need a nap)

20 gauge fine silver 8mm mandrel

Make your jump rings and fuse them together.

IMG_6560

I use a hard charcoal block for this.

The most important thing to remember when fusing silver is to make sure that you have no gaps in-between the two parts you are fusing together. The join has to be completely touching. If you have any gap at all, however tiny, the ring may fuse, but you can end up with a thin area of the ring which will be weaker than the rest of it.

So preparation is key.

Place the rings on the block with the joins all facing the same way. If you’ve done your job right and the ends are flush against each other it can be really hard to see where the join is so this eliminates that problem.

You want your flame to be a little softer than perhaps you usually use so you can turn down the pressure on your regulator a little to get it to a nice balance that will heat the silver, but isn’t so fierce that it melts it.

Now keep the flame moving around the ring until you see it just start to change, then quickly hover it over the join and take it away immediately the silver flows.

Keep the flame there too long and it will melt into a ball. Then you just continue to melt the ring and add it to your ball collection.

This might grow considerably as you practice.

It’s o.k. ;)

You want to keep the flame moving around the ring as the whole ring should be brought to the same temperature. If you get a gap, or a thin area, where the join is you either had a gap there to begin with or you have heated one side of the ring a little more than the other and the silver has gathered there pulling itself away from the join.

It’s just practice.

You don’t need any solder or flux to fuse these fine silver rings together.

Now you are going to stretch the rings out using a pair of round nose pliers.

IMG_6563

Try to keep the rings at the same place on the pliers each time you stretch one as you want your shape to be as consistent as possible. I use the tips about 2mm down. You can mark the pliers with a sharpie or tape if you need to.

It’s at this point in the game that you’ll discover if your joins are fused properly.

It’s good to find this out now rather than later, so either re-fuse the broken ones or add them to your ball collection.

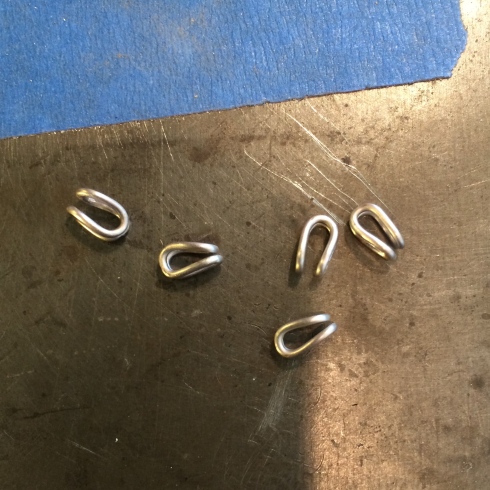
IMG_6564

Now squeeze the middle together.

IMG_6565

And bend them in the center.

IMG_6566

IMG_6548

Use a length of wire, (I’ve used copper here), to anchor one end of the link and push the top ends together.

IMG_6567

Now you can slide another link into the first.

IMG_6569

To do this you may have to squeeze one end of the second link together slightly so that it fits through the hoop in the top of the first link.
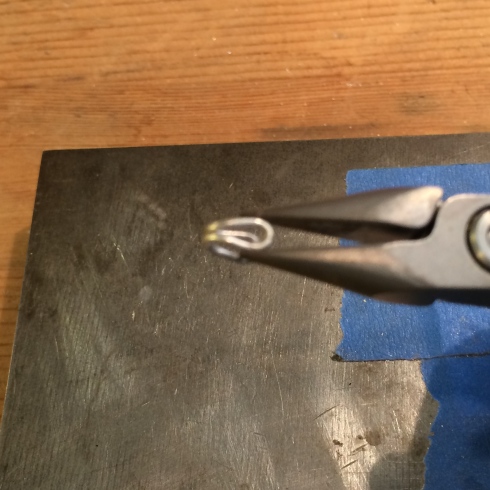
sorry about the photo.

sorry about the photo.

Also you can push an awl, or your center punch, through the hoop you wish to thread the next one into to widen it slightly.

IMG_6534
Now you just continue to make the chain until you get to the length you need.

IMG_6570

Once it’s completed, anneal the chain by gently running the flame backward and forward over it until the surface of the silver just changes slightly, and then quench it.

For the next part you’ll need a draw plate.

IMG_6555

I bought mine HERE, but you can find them anywhere, and any kind will do. I just drilled a hole through an old piece of wood before mine arrived.

Once the chain is annealed pull it through the draw plate to even up the links and make it look beautiful.

IMG_6557
You just want to even up everything at this point and not stretch it so be careful which hole you pull it through.

The chain will be crunchy afterward so just loosen it up in your fingers and then voilà!

You are done.

Finish it however you prefer, I like to blacken mine, and then make something extraordinary with it.

Go on. You know you want to.

:)

P.S. Remember Ann Cahoon has a great visual tutorial on chain making – HERE


If you can remember, way, way back, before yesterday

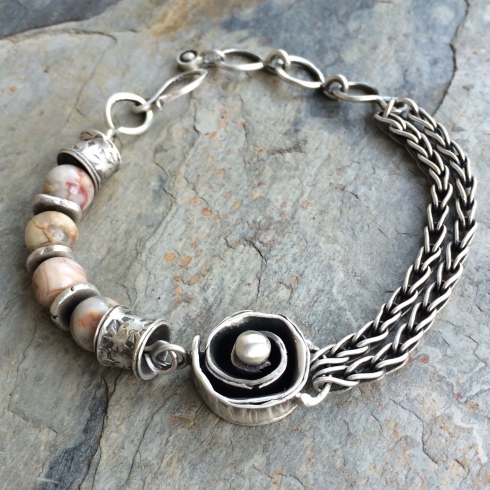
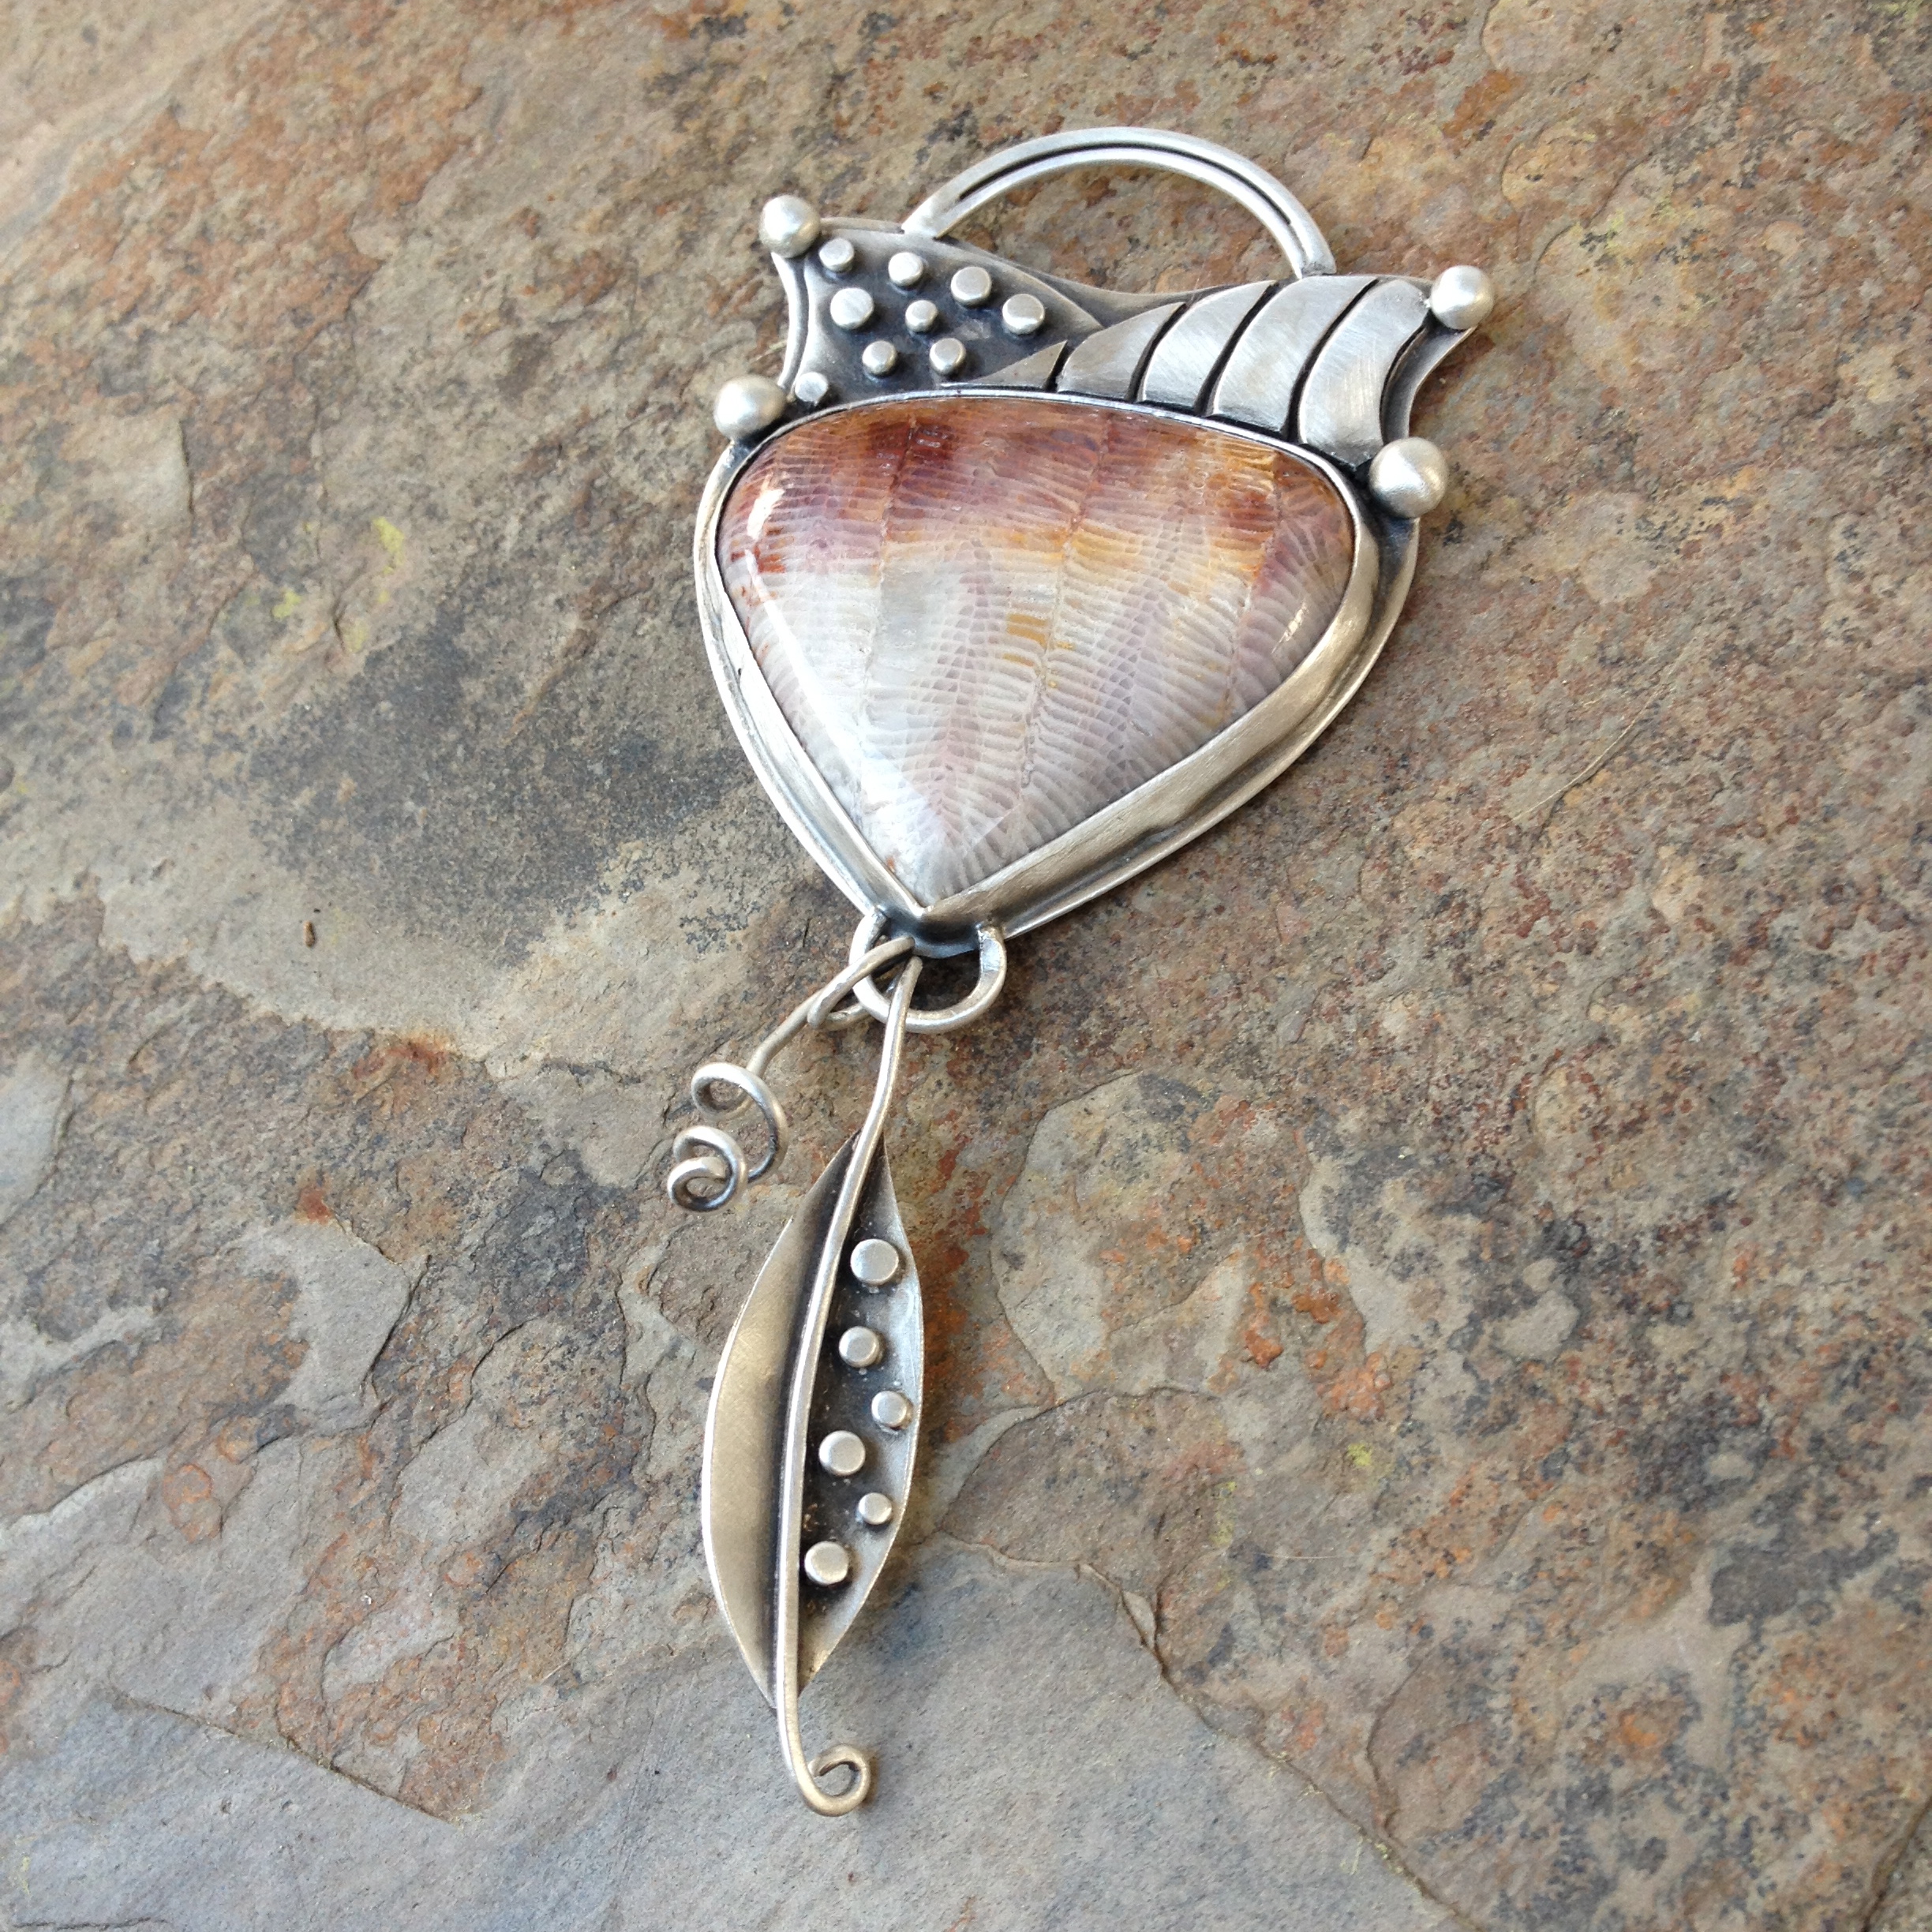
I was getting ready to make this.

Willow Jasper

Poor photo 

Then my family came.

And went.

:(

I really liked the lightness of this design, but for some reason, which I can’t remember now, I went a different way with it.

Now it’s heavy and Victorian looking and only people who like heavy Victorian looking things will perhaps buy it – which leaves out most of the population.

Is this self sabotage I wonder.

To make jewelry which is not to the taste of the majority of people.

Or is it a genius scheme to save me from ever parting with my beauties.

We may never know…

So this stone, which is beautiful by the way and now happens to be one of my new favourites, had to be pried from its setting twice because one of the balls kept falling off.

We won’t mention names.

IMG_6505

Carrasite Jasper

I hate it when this happens and for it to happen twice, each time after I had cleaned it, blackened it, polished it and smiled with satisfaction at it, just sent me right over the edge.

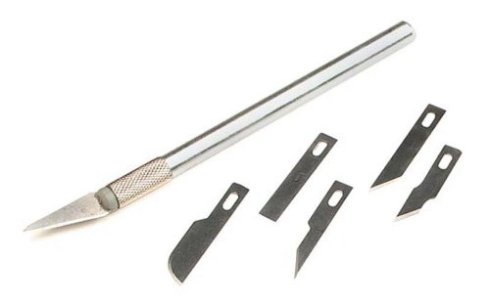
The best way I’ve found to pry a stone from its setting once you’ve pushed the whole bezel collar over and sat back thinking it’s done by golly, is by using a scalpel.

I used to use one of these double ended pottery tools

CleanScraffitotool_grande

Because I’ve got loads of them hanging around.

But even though they look thin, the knife-edge is actually a little too thick and it’s also easy to bend.

So, after much deliberation, like a nano seconds worth, I went to the scalpel.

31aGooWCksL

Which seems more dangerous, and it is, but sometimes we have to blow caution to the wind and just get down to business.

Just gently slide the blade down in-between the bezel collar and the stone and wiggle it slightly until a small opening occurs, then slowly move it around the stone. Sometimes you can’t slide it and have to push it down again to make another opening.

The key is to do this slowly and to not push the collar too far out from the stone all at once. It’s best to do it in little movements as you work your way around the stone.

If you try to move it all at once the collar will get marks and crinkles in it so you want to do the least damage to the collar as possible.

Otherwise you may as well throw it in the bin and start over.

The tip of my scalpel blade snapped off which makes it easier to use. In fact you might want to take a small section of the point off to begin with so that you don’t have it fly into your eye when it decides to do it for itself as that wouldn’t be good.

Needless to say, always use your safety glasses as well as crossing your fingers.

So, there you have it.

I sincerely hope that you won’t ever have to take your stones out because your balls fall off, but if you do, know that there is hope.


Back in the saddle… almost.

It takes me a while to get back to normal after my family leave.

I like to sit around wallowing for a couple of days.

I also like to give up cooking, stop going to the grocery store and stay in bed for a little longer.

O.K. so I always stay in bed for a little longer, but now I have a reason to.

My brain stops thinking about anything much and my head becomes a dull vacuous cave with barely enough sunlight for even the dust motes to play in.

(Too much?)

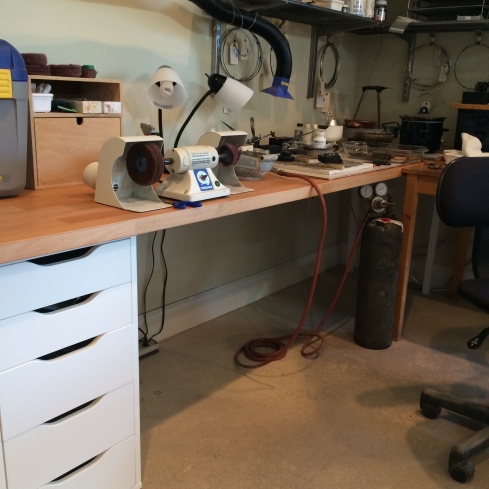
But I have got a great new studio to get back to.

When K was here we found a small backwoods furniture shop called IKEA and bought me some new stuff :)

It was a great opportunity to get this done as my sister was able to lift all the heavy stuff while I directed.

She didn’t complain once about her RA, but I did have a sore finger and couldn’t quite manage.

Actually we found a nice man who put everything into the back of the car before I could turn around to help him.

If only he’d waited.

Now I have drawers.

IMG_6482

IMG_6484

IMG_6483

And super solid work surfaces instead of the jumble of old tables I used to have.

IMG_6481

IMG_6479

I still have my old table that I do most of the work on because the new ones were too long for the space, but I put a plank on two of my little drawer things and now I have a shelf and even more drawers to keep my bezel wire, silver plate and the small useful things which clutter the table when they’re not being small and useful.

IMG_6480

I’ve still got more putting away to do, but to be honest, without K here I’ll probably try hard to ignore it, but ain’t it great :)

Just wait until I show you my bead drawers!

You’ll die.

;)


So where were we …

Well my dad left

:(

And then my sister left

:(

And once again I find myself here, all alone, in this strange land they call Texas.

It was great to see them. I really had a good time.

Dad was here for three weeks, which seemed like only one, and my sister was here for two.

Now they’re both gone.

Back to the Mother Land.

Without me.

And I had to have a little cry on the way home from the airport.

Well a howl really.

It happens.

I didn’t do much of anything during their visit which was nice.

Dad liked to sit outside in the 100 degree heat and read his book. I could only manage ten minutes at a time and I’ve lived here for twenty-six years.

My sister also liked to sit outside in the 100 degree heat and read her book.

Man!

You know what they say about mad dogs and Englishmen.

I’ve never been able to sit outside in the heat. Of all the people to come live here in sunny Houston, I was probably not the best first choice.

We went to the theatre to watch The Foreigner by Larry Shue which was really good and we had to laugh out loud.

Except it was FREEZING inside the theatre and we almost had to cry also.

I know, I know.

It’s too hot, it’s too cold. What’s a girl to do.

Live in Hawaii that’s what…

Anyway we didn’t ‘do’ the Space Center because it was like 100+ degrees and the thought of being outside on their little open air tram tour seemed a little…well, hot, but P did take my dad fishing  five times! because out in the bay where the air is so still that the water doesn’t move and the heat beats down on you to the point where you think your brain is frying and you can’t see the shore line which is your only hope for survival and you begin to think you’re living in some strange hallucinatory land from your worse nightmare is exactly what the doctor orders for all 85 year old men.

Did they listen to me?

No.

And what did we get to show for the worry?

One little fish.

But

Dad survived to live another day and I think enjoyed living on the edge even if it did nothing but to prove that we’d never survive on their hunting and gathering skills.

My sister, on the other hand, found that worrying about whether your fishing skills are sufficient for survival meant nothing compared to being taken aside into the ‘special’ room at the airport because your hands show evidence of recent exposure to explosive materials.

We think that the only possible explanation for her detainment could be that we had been in my studio just before we left for the airport. Who knows what chemicals are lurking there. Fortunately I don’t know what to do with any of them except to make jewelry and my sister definitely doesn’t know what to do with them.

Thankfully she passed their second test and so avoided the ‘extra special’ room where she believed that the latex glove worn by the nice security lady may well have been put to good use.

Whew!

Sorry K.

So, now they have gone

:(

And I’m still here

:(

It will be O.K.

Send chocolate…

I leave you with a photo of the only family I have left.

IMG_6476

Aside from the two humans who live here.

IMG_6477

And Pickles who doesn’t like to socialize with the local riff-raff.