Category Archives: Jewelry Stuff

I present to you the…

Pathetic Lump.

IMG_7157

Looks like a creature from the unknown.

Not to be defeated I went on to make a bigger, better, stronger,

Pathetic Lump

IMG_7159

So that the first Pathetic Lump would have a friend and not feel so alone in its patheticness.

IMG_7152

Little do they know that their friendship cannot last as it’s back to the flames with them.

As soon as I can be bothered to go through the whole process of making yet another mold.

Don’t fret for them my friends as once they stand at the crucible’s edge they will happily sacrifice themselves to the inferno knowing that other forms may come into being.

If the form master can get her act together and figure out how to do the darn thing.

Actually I think I’m close.

It’s just the sprig that needs sorting out is all.

Too much silver is trying to force its way into that little tube and starts to cool before it can fill the mold. I just get too nervous when I’m carving away the sand in case I hit the mold and mess it up.

Obviously I’m nowhere near it and can dig out another centimeter at least.

Onwards and Upwards.

We will never surrender.

In other news.

The painting, or at least one of them, is coming along.

IMG_7161

I call it,

‘I can be a little harbour if I want to so leave me alone and get on with your own stuff why don’t you.’

I’m just going to figure out how to make the houses look not so silly and then I do believe I might even say that I have finished it.

I know right!

Also,

I bought me a cup.

MLD016

Ain’t it cool

:)

Off to make the new generation of Pathetic Lumps now.


It worked!

Thanks for all the good wishes.

We had a great art fair and the weather was absolutely perfect.

For a minute I thought we must be somewhere other than Houston.

NO humidity what so ever.

Brilliant.

AND I met this really neat little old guy and we chatted forever about jewelry making.

Loved him.

Never had such a good conversation about flux and firescale.

Today I feel shattered.

Everything hurts and I even had to get out of bed early because my legs hurt so much that I thought I needed both hips replaced. Like immediately.

Man!

How do all the other people do it?

Am I the only weenie around?

So today, after I had to take Advil (double weenie) I’m off out to the studio to either try my hand at sand casting again, or to finish up my painting.

I’ve cast two things so far. One with the bad sand which I sent back, and one with the good sand which I’m actually thinking is also bad sand because there’s no way the pathetic lump of silver that emerged from the mold could be my fault.

Bit of a let down really.

Not going to give up though.

I’ve also come up with a better way to cut my jump rings so I’ll be writing about that (Gale) as soon as I get back to jewelry making.

Might be a while with the old hips playing up though.

So, $2,500 is going off to Care.

Thanks for all the good wishes and to the weather god.

I think I love you…


Wish me luck

I’m off to the art fair!

(Sounds like it should be a song)

It’s going to be a lovely day which is all I could wish for here in Houston.

Please no humidity.

Please.


Finally!

I’ve got some things done.

It’s been like pulling teeth.

Every day I go into the studio just to find some excuse to take a break.

Even after just fifteen minutes.

When I can’t find a reason to leave the studio I just decide that I’m so thirsty I’ll die if I don’t get a drink stat!

What’s all that about?

Remember this.

IMG_6925

That wouldn’t cooperate and decided that it just didn’t want to be made even though it deigned to pose to show you what you can do with all your broken pick sticks.

Well it took me three days by Jove, but eventually I was able to finish it in-between all the drink breaks and consequent rest room trips.

IMG_6940

Chalcedony

Not completely sure about the beads though.

IMG_6942

And I ordered an I.D. stamp.

Ain’t it cool :)

From Infinity Stamps.

They’re very expensive, but I’ve had one before and I really like the quality.

You just design your logo and send them the pic.

IMG_6944

It also took me five years to make these.

IMG_6971

Ocean Jasper

IMG_6974

Ocean Jasper and Chalcedony

In the meantime, while I was procrastinating going into the studio by ordering more stuff, I bought a sand casting kit.

IMG_6934

The wrong one as it turns out.

It all looked so easy on the videos, but man, that sand went everywhere. I even got some in my mouth.

It was like I was a child again.

O.K. still…

I couldn’t keep my space clean to save my life, yet the man on the video didn’t get a grain out of place.

It was very depressing.

My first casting came out so horribly that I just packed all the stuff back into the box in disgust and put the whole thing down as a waste of money.

But I really, really wanted to do it :( and if that man could do it, so could I damn it!

I’d bought it on Amazon and decided to go back there to buy some different sand and try again.

The same sand that the annoyingly good at it man used.

And, while cursing myself that I always get things wrong, I decided to read the reviews on the kit I’d bought.

Now I always read the reviews before I buy anything.

Always… except for this time.

Should’ve read the darn reviews.

Everyone complained about the sand, and when I came to think about it, I couldn’t quite remember why I had bought the brand I’d gone for in the first place when it was more expensive than the brand I’d originally gone onto Amazon to compare pricing on.

The funk’s messing with my brain man!

Then I got a bit ticked off because it was 120 odd dollars and it didn’t work even though it said, new and improved sand, in big letters on the tub.

That should’ve been my first clue.

So in a fit of determination I sent the whole package back even though I’d used the sand and the casting flask had burn marks around the funnel area where I’d poured the silver in.

I told them on the little return box that I’d used it, but that it was horrible, but Amazon refunded me straight away, even before the company had received my parcel back.

I was quite impressed.

Don’t know if the sand casting people are going to be though.

Now I’ve ordered the one I wanted in the first place.

173-015

Stay tuned…

Emboldened I next contacted a nice lady on FB who reps for JoolTool.

I’d decided that I’d had enough of defective tools and products.

If you remember some of the discs that came with my JoolTool (seven of them!) kept spinning off the spindle when I was using them because their threads had worn or something.

These things are expensive and so are the adhesive pads and papers that you stick to them.

Diamond-Hard-Stone-Kit-300x300

I mean this bunch right here cost over $400!

(I shouldn’t have looked at the price…)

I’d already contacted the shop a couple of months ago and no one had answered me, so I was feeling pretty taken.

BUT this rep was great and Anie, the product designer and owner, phoned me and walked me through fixing them and now they are perfect and ready to go!

Great result.

Great customer service.

Very happy camper right here.

To celebrate I have a little pair of earrings you can make.

IMG_6964

All for you :)

First take 18 gauge sterling silver wire and wrap it around a mandrel six times.

IMG_6947

I’ve used the largest ring on this pair of pliers.

It always irritates me when I get this particular pair of pliers out because I can’t remember why there is a number 1 and an asterisk on them.

I don’t think I put it on them, but why would I buy a pair that were marked?

Just another of life’s mysteries to mess with my mind…

Now snip and solder them.

IMG_6948

Shape them into rough ovals and haphazardly hammer them.

IMG_6950

And group them into threes.

IMG_6952

As always I’ve forgotten the next photo which would have been of making a loop out of a thicker piece of wire.

I used 8 gauge half round wire.

Now loop the three wires through it and solder the top of the loop together.
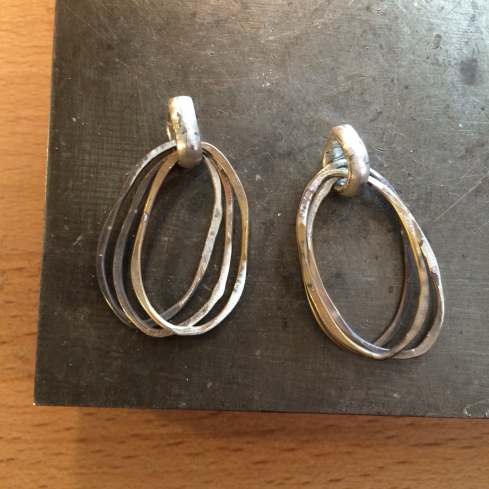
IMG_6953
Because the half round wire is thick I left the top of it shaped as a teardrop instead of trying to get it perfectly round.

Now find two large silver balls that you have in your silver ball scrap box and solder one onto the rounded part of the thick tear drop ring.

The next photo’s are fuzzy, sorry. I tried hard to get good ones, but, as good as I am, I couldn’t hold everything at once.

Hold the tear drop point facing down in your third hand tweezers.

If you haven’t already got third hand tweeter, get some.

They’re invaluable.

Saves a lot of hospital visits.

Now make sure that all of the soldered areas of the thin large rings are facing down away from the tear drop and place one of those old pick sticks through the tear drop to separate the three rings from the soldered part of the tear drop.

This will help prevent the tear drop solder flowing onto the three rings while you’re soldering the ball onto the round part of the tear drop.

Capisce!

IMG_6956

Put some flux on top of the round end of the tear drop and on the bottom of the ball.

Heat the bottom of the ball and pick up a melted ball of solder with it.
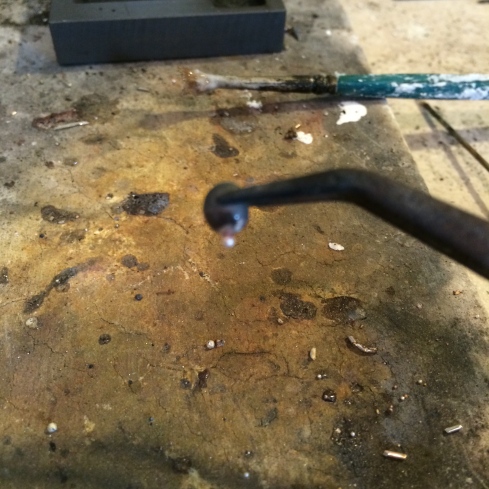
IMG_6961

Now heat up the round end of the tear drop and solder the ball onto it.

Turn the tear drop over and clasp it in the third hand, again putting the broken pick stick between the bottom of the three rings and the inside of the round end of the tear drop as before.

IMG_6958

Get a little jump ring and place it in your third hand with the join facing downward and put some flux on the bottom of the jump ring and on the tear drop end of the large ring.

Gently heat the jump ring and pick up a small piece of solder as you did with the ball.

Now heat the tear drop end keeping the jump ring away from the flame, but close enough to stay heated and when the solder is ready touch the jump ring to the tear drop end.

IMG_6960

Pickle the earrings.

Make some ear wires.

And polish the way you desire.

And voilà!

Your earrings are ready.

IMG_6964

Now you can knock yourself out and make as many variations as you want.

IMG_6966

I tried a different way to connect the ear wire here, but don’t like it as much as the other way.

Always good to experiment though

;)

I leave you with the progress of the painting.

IMG_6978

And,

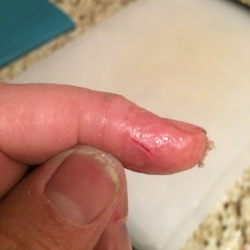
you might want to look away…

a poor me sawing injury

because when you’re in a funk normal activities take on a life of their own and like to do things to make you swear.
IMG_6929

I’ve made it small for grossing out purposes.

A lot.


So the plan was…

That the chunky chain got a home.

Didn’t happen.

Instead I started a new painting.

IMG_6914

Yes, I know I said I’d given it up again…

So I got this far and then decided I was bored with it.

So I moved over to the jewelry area and half heartedly played around with some sketches and stones.

IMG_6913

And decided on the spider one.

IMG_6918

Even though I knew that it really wasn’t ever going to be the same as the drawing.

Just to step it up a bit I used one of my new stamps on it.

IMG_6920

And then soldered it onto a back plate that was way too large for it.

IMG_6923

That annoyed me as I usually pay a lot of attention to the amount of silver I waste to the point that I often have zero wiggle room to work with which also annoys me because then it’s touch and go that I’ve enough silver around the piece to do what I want with.

Guess the search for a happy medium continues…

Now I will share with you a tip for what to do with all your old pick sticks.

I don’t know about you, but after a while my picks start to loosen from their wooden handle. Even though I try to ignore it for a while they eventually start to swivel in the handle when I’m doing the picking thing with them.

I still try to ignore it, but then it just begins to get ridiculous and I can’t do a thing with them.

That’s when I get excited because I remember that hey! I can just buy a new one.

503021.jpg

I’m a bit slow on the uptake sometimes.

So, not one to be wasteful, (apart from the huge amount of silver waste above), I keep the pick ends and use them to prop up pieces when I’m soldering.

See.

IMG_6925

Anyway, long story short, it all looks good here, but the soldering flopped due to the funkness and then I had to go in to make dinner…

Not before I added a bit more to the painting though.

IMG_6926

So… that’s it.

In other news, while I was bored with it all and in one of my funks, I bought a new table top to add to the jewelry bench area and now it feels more complete.

IMG_6902

I’m telling you, that small Swedish store is a blessing when you need a funk distraction.

IMG_6904

Now my jewelry area is fantabulous.

IMG_6905

And I feel very fortunate.

IMG_6908

IMG_6903

IMG_6907

And just so the painting side of the studio didn’t feel left out I bought it a new table and drawers also.

IMG_6911

That side is still a bit of a mess, but I’m working on it…

But look at all my pastels!

They have a happy home…

:)

IMG_6915

AND last, but not least, I have to tell you that I’ve hit another milestone.

$40,000!

Next stop $50,000.

See where I’ve sent it – HERE

TTFN


It’s a Monday!

Another chance to save the world.

Today I am going to get out of bed and make something with my chunky chain.

IMG_6900

Can’t think what yet, but I’ve given up painting again so that will help get me back into jewelry mode.

I’m a little concerned, however, as my alarm went off this morning and I have an awful feeling that I should be going somewhere that I’ve completely forgotten about.

I’m going to miss something I don’t want to go to.

I just know it.

Like a doctor’s appointment, or the evil dentist man.

Because that’s the only reason I ever put my alarm on.

While I feel somewhat relieved that I can’t remember where I should be going today, I now have that pit of doom feeling that I can run, but not hide, from whatever it is I should be doing on this fine Monday morning as they’ll get me in the end.

I always book nasty things on Monday mornings to get them out of the way.

Maybe I should make a Monday morning appointment for a dementia test…

Nah.

Too much saving the world to do.


So I think what happens is…

I go go go go go on the creative front and then

I flop.

It’s probably that my brain needs a break and shuts down for a while.

It can be dangerous when that happens as you know it will just come back with a vengeance.

The funny thing is that I never thought of myself as being creative.

Someone had to tell me.

I’ve had a great run on sales just this past two weeks.

It’s incredible really.

Just when you start forgetting about what to do with all the ‘stuff’ you make it kind of starts taking care of itself.

I’m very lazy on the selling part though.

I don’t list as often as I could on Etsy or my website.

I’m liking my website a lot more than Etsy, but I don’t know if anyone really goes there. I’ll have to figure out the SEO stuff.

Soooo

(tapping the keyboard, eyes off to the left top corner…)

My brain’s still shut down and I don’t know what else to tell ya.

Except that I’m thinking ceramics, embroidery, and more sorting and throwing away the remnants of three grown and flown kids.

I’ve also started some more paintings.

No, not the paintings I was talking about in a previous post, but my fun, piddly ones.

I’ve resigned myself to just enjoying them for what they are and stop moaning about it.

That just gets boring and I have to lay down on the sofa again.

Not cool.

IMG_6835

IMG_6884

IMG_6850

And here is a chunky chain I’m working on.

IMG_6900

And I finished a pair of earrings.

IMG_6887

And a bracelet.

IMG_6859

And these.

IMG_6847

All while Spud defends her sovereignty as Queen of The Table.

IMG_6885

Don’t mess with the Spud.


I’ve been boring myself again…

I’ve got no energy Ma…

And, to knock myself really into the what the hell zone I’ve just finished a necklace which is like,

what?

IMG_6864

Maybe it’s just me.

I’ll be back when I’ve figured out how to not bore myself.


I don’t know where I’ve been all week.

It’s just flown by.

I have been a little bored with the jewelry and just can’t seem to be bothered to start anything new.

I finished this for Serina.

IMG_6676

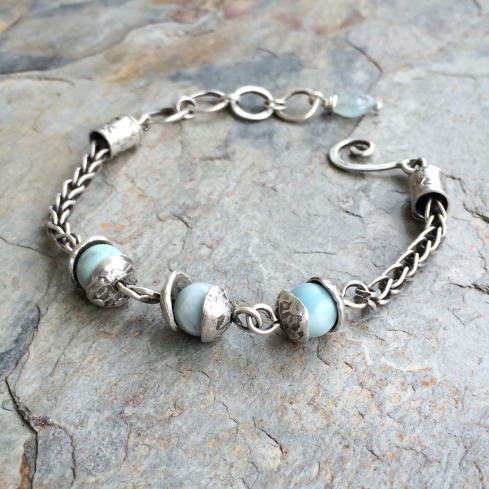
Larimar

And then decided to use up some more of my larimar beads.

IMG_6772 - Version 2

That bead cap needs a little adjusting.

IMG_6826

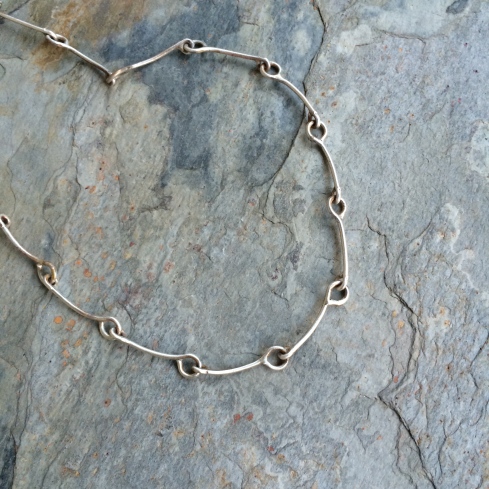
And then I started a new chain.

IMG_6828

But apart from that not a lot going on really.

I’ve been watching some BBC videos on artists that I found on Youtube. The series is called, What do Artists do all day? And I’m really enjoying that.

My favourite one so far is the one on John Byrne.

It all started when I stumbled across a series on Youtube called JTV Rock Star Designer because I was too bored to bother going into the studio and needed some inspiration.

I’ve suffered through all six episodes so far, and now have to wait until next week to find out who the two finalists will be. I think the winner gets to design a jewelry line for JTV.

I’m actually very surprised at how horrible the jewelry is and that, in the six hours they’re given to complete a piece, they can’t seem to make something that looks a little more professionally finished, but I suppose they’re under a lot of pressure. Also they’re only given half an hour to come up with an idea. That would be the hardest part for me as I generally make it up as I go along.

They’re also given some pretty gruesome materials to work with.

I’m not particularly impressed with the show, but of course now I have to finish watching it.

Then I discovered the artist videos and I love them.

It makes me want to go back to art school.

I went to Winchester School of Art in the U.K. What I wanted to be was a painter, but somehow I ended up in the sculpture department. I still would like to be a painter, but I’ve never given myself enough time to really get into it and now I just end up making piddly paintings which I enjoy, but which aren’t real paintings in my opinion.

Now these artists are making me a little sad that I never really gave myself to it.

I did love making the sculptures. I especially liked working out how the darn things would actually stand up and not kill someone.

I still think about making a sculpture of a woman sitting with her beautiful legs crossed in her beautiful designer clothes using nothing but used fake finger nails. I mean, what do they do with all of them once they’re done. I imagine that there are bazillions of them, in all shades of lovely, somewhere out there filling land fills and waiting to destroy our world.

Perhaps she could be having drinks with a refugee.

Who knows.

So I got my degree and then, nothing.

Well, there was the marriage part, and then the kids part, so it wasn’t exactly nothing.

Now it’s my part, and I’m really enjoying it.

Problem is that I’d have to get up before yesterday and go to bed after tomorrow, to be able to do all the things I’d like to.

Just pick one laddie!

Anyhow, so while I’ve been away I’ve been dreaming of all the things I started out to be and how I need to start being them.

The time is now people!

We just need to get down and be the people we know we are inside and stop fussing around with all the other stuff.

O.K. Well I do anyway.

;)


For Nancy.

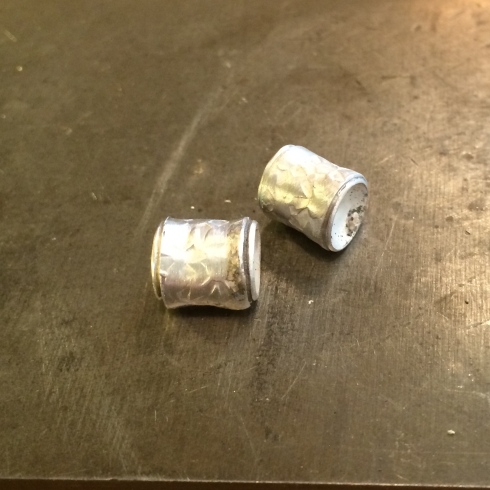
The end caps.

You can make these plain or textured, wonky or straight, rustic or perfect, but these are the way I made mine for the pieces you’ve seen.

I use fine silver.

I buy all of my sheets in fine silver and most all of my wire in sterling. I like to use fine silver for my bezel settings because it doesn’t tarnish like sterling.

Sterling tarnishes when exposed to air because it has a little more base metal in it than fine silver. Sterling is .925 silver and fine silver is .999 making it purer. PMC is also .999 as is Thai Silver.

Just love the Thai Silver :)

Back to the project…

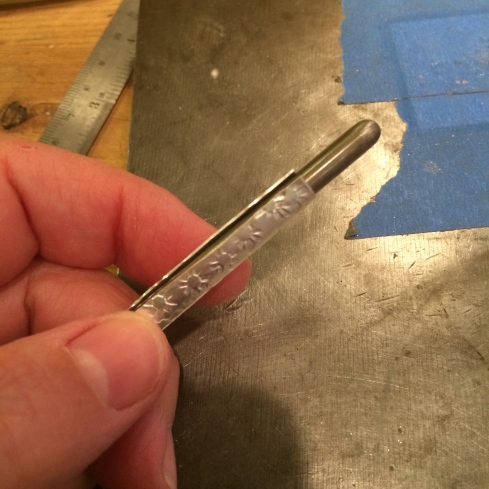
Cut a strip of 24 gauge sterling silver, or fine silver, sheet and texture it with a favourite stamp.

IMG_6598

I have a selection of stamps from the Indian Jewelry Supply store – HERE

It’s like christmas every time I look at them.

Cut a manageable length off the strip and wrap it around a mandrel.

IMG_6602

You might need to anneal the silver to do this as stamping, hammering, or any work you do to a piece of silver hardens it. Annealing the metal by running a soft flame over it until it changes colour and then quenching it, softens it again making it easy to work with.

Some people don’t quench afterward as they say the silver hardens again, but, as you may know by now, I’m too impatient to wait for it to cool on its own and I’ve found that quenching doesn’t really affect the results I want for this project.

When you’re annealing be careful not to melt the metal. It just takes practice. If it does start to melt no worries as you can then practice your reticulation skills, but that’s for another day… ;)

You want the silver to just begin to turn a dull pinkish color then take your flame away.

Now you can bend it around the mandrel until the two ends meet for soldering.

IMG_6600

The mandrel can be anything that is the shape and diameter you want. I often use anything on hand. The shanks of my stamps or dapping tools, wooden dowels, but better still are the mandrel sets that come with a jump ring maker.

Like this

116581.jpg

As you then have a selection which will last you forever and you can more easily match the mandrel diameter to the size of bead you’re using.

I’ll be using 8mm beads for these tube ends.

Now solder the seam.

IMG_6603

Once soldered you can cut the tube into the lengths you want either by hanging it over the edge of your bench pin.

IMG_6604

Or by using some other way to keep the tube secure as you saw.

This is an old paintbrush.

For this method, slowly turn the tube and gradually saw around the circumference for an even cut.

IMG_6611

Now you can put the smaller lengths of tube back onto the mandrel so that it just overhangs a couple of mm’s making it easier to file the ends straight.

IMG_6605

At this point you can decide whether to keep your tubes straight or make them wonky.

I like wonky.

So I use one of my dapping things to hammer into the tube to flare out the ends slightly.

IMG_6608

And then I might even hammer them down even more to wrinkle them.

I haven’t done that here, but just so you know all of my secrets…

IMG_6609

The next step is to punch out the silver discs which will be the end caps of the tubes.

I like them to be just a fraction larger than the tube, (including the flared out diameter), as you’re going to dome them and this reduces the diameter of the disc.

IMG_6613

Now you can use a hole punch or a drill to make a hole in the center of the discs.

IMG_6616

I’ve found the easiest way to use a hole punch is to mark exactly where you want the hole to be with a sharpie and then place the bottom of the punch over the mark.

Then you can see exactly where to punch.

IMG_6614

Now you will shape the discs into the caps using a dapping block.

IMG_6618

If you don’t have these tools you can perhaps use makeshift ones.

Making shallow holes in blocks of wood, for instance, may make a good substitute for the dapping block. You can also round off a matching dowel piece to use as the punch.

For the discs you will have to either saw them or snip them. You can then file them down when they’re soldered to the tube.

At this point you are going to solder the caps onto the tubes.

You can solder the first cap from the inside.

IMG_6620

But will solder the second cap onto the top.

IMG_6619

Warning:

You can only do this if there is at least one hole in the silver for the hot air to escape.

If you do not leave a hole the heat will build up inside and the piece will explode!

It will fly away from the soldering board and, if you’re as lucky as me, will probably land on your body.

And it will hurt.

IMG_6621

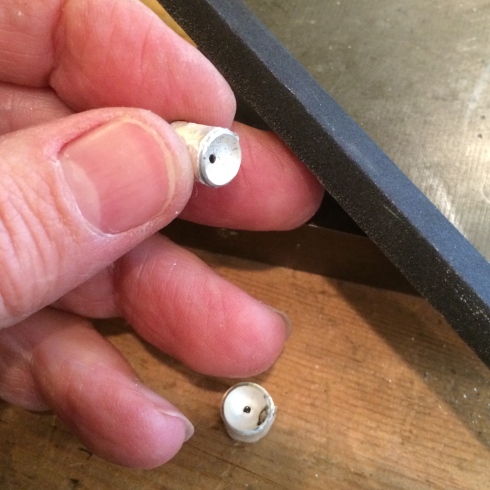
Now clean up the edges of the caps with a file and sanding board.

IMG_6623

And they are pretty much done.

IMG_6624
These are my ‘rustic’ ones, but you can make these so that the joins don’t show. It will just take more precise measuring and filing, etc.

IMG_6626
Here’s what I did with mine.

IMG_6629
:)